In general, the point of this walkthrough is to go through quickly without unnecessary additional tasks, although without some additional tasks you will not complete the main ones, so let’s get started:
"Scat 5" - Explore the crash site

Description: Explore the crash site of the Skat-5 helicopter
Walkthrough: One of the first story quests. Everything is simple here, we need to get to the helicopter, which is located inside the “Swamp” anomaly and search it. I don't think anyone will have any particular difficulties. Access to the Anomaly is free, the main thing is not to run into hungry dogs or anyone else.

After searching the helicopter, it is discovered that all the electronics inside have burned out and now we need to find the cause of the burned out electronics. We will find the reason by completing another quest, so we're done with this for now.
Tips: In an anomaly, use a bolt to create a road. Near the helicopter you will find some provisions in a box.
"Scat 2" - Explore the crash site

Description: Explore the crash site of the Skat-2 helicopter

Walkthrough: So, we searched Skat-5, we run further, to the second helicopter, to the very edge of the map to the South-West, right near the “Iron Forest” anomaly. A poltergeist is flying near our target, so we move slowly, as it reacts to the movements of the GG. We kill the poltergeist and can search the Helicopter. Another screensaver on the engine, in which Degtyarev (GG) discovers that the crew of this helicopter died in the air, but on the on-board computer they managed to find maps of the area between Zaton and Jupiter.
Tips: We search the nearby corpses of military personnel, collect cartridges, etc. If a poltergeist notices you, it will throw objects, hide behind corners and various shelters.
Area maps: Find interested people

Description: Find someone who will be interested in the cards you find
Conditions of issue: The Skat-2 helicopter was found and inspected.
Reward: Discount on transfer between locations
Walkthrough: We go to the dry cargo ship "Skadovsk", talk to a stalker named Pilot, offer him to take the cards. He copies them onto his PDA. Now we know that there is a shortcut between Yanov station and Skadovsk. They gave us maps of the area and got the opportunity to travel cheaply between locations.
"Scat 3" - Explore the crash site
Description: Explore the crash site of the Skat-3 helicopter

Walkthrough: It’s not easy to get to the third helicopter, so we’ll go to Stalker Noah, who lives in his “ark”, just south of the port cranes. In his ship he keeps a tamed dog, Lassie. We talk to him, ask about helicopters and agree that he will take us to the Plateau. We appear on a burnt out farm, there are a lot of “Zharka” anomalies around, we follow which road Noah is walking on, then we follow him. Don't forget about the bolts! We reach the edge, push off and jump into the “Teleport”. (Attention - accelerate well, otherwise you will have to jump again) We teleport near the "Circus" anomaly, and go to the Plateau. There is a lair of snorks near the target, so it’s better to destroy them first before they do this to us). After that we go to inspect the helicopter

Skat-3. We receive information that both engines failed during the flight, and in the on-board computer we find a map with marks of evacuation points “B2”, “B28”, “B205”
Tips: Staying in the anomaly for a long time. Frying will greatly damage your suit.
Evacuation places: Check point "B2"
Description: On the map found in one of the helicopters, evacuation points were marked. You should check to see if the military showed up there.
Conditions of issue: Skat-3 inspected
Evacuation places: Check point "B205"

Description: On the map found in one of the helicopters, evacuation points were marked. You should check to see if the military showed up there.
Walkthrough: We head to the Volkhov air defense system in the location of the Vicinity of Jupiter. There are a lot of zombies in that area, so it is better to take a shotgun or other effective weapon. We go into the building, in one of the rooms we find on the table a note from Sokolov with the content: “An old sheet with a schedule of posts; four numbers are visible on the bottom: “1421.”

On top of the old notes it is written in marker: “Lieutenant Sokolov V.I. Due to the helicopter crash, he proceeded to evacuation point B205. The evacuation did not take place within two days; further stay at the point is associated with an unjustified risk. I decided to leave the point and proceed to the mobile laboratory of the scientific expedition. The laboratory is located northeast of the evacuation point." Code 1421 will still be useful to us, we go down to the basement, to the closed door, enter the code. (Although in fact we do not need to enter the code). Below there will be a flock of jerboas, and there will be a large room fight with Burrer. Try to dodge the objects that he throws, and also hide behind large boxes. Next, climb up the stairs and find yourself in a room closed from the inside with a small arsenal. There is also a rocket launcher and two shells for it. The task is completed, the rest search point B28.
Explore the crash site of the Skat-1 helicopter

Description: Explore the crash site of the Skat-1 helicopter
Walkthrough: Location Neighborhood of Jupiter. We go to the helipad. The passage is blocked by a minefield. But you can get to the helicopter along the fence. (or as I did, we see a cemented path, we walk along it, avoiding dark places in the screenshot they can be seen, although clumsily, but highlighted for those who do not understand)

We approach, inspect, pick up the Black Box and take it to Azot on Yanov. He says that decryption can take about three hours, and the money will come out to a decent amount. So, we wait three hours and approach Azot. We give him three thousand and listen to the received audio recording, which says that in the event of an accident, everyone should go to evacuation point B28.
Explore the crash site of the Skat-4 helicopter

Description: Explore the crash site of the Skat-4 helicopter
Walkthrough: We enter the factory building through the southern gate, along underground corridors we find ourselves in a hall with a destroyed roof. It will be difficult not to notice a fallen helicopter. We examine it, but don’t find out anything particularly valuable.
Path to Pripyat
Description: Judging by the records from the “black box” of one of the helicopters, the military was supposed to gather at the evacuation point “B28”. It is located in Pripyat: that’s what the maps found in another helicopter say, anyway. You will have to look for an opportunity to get there - you need to talk about it with the conductor.
Quest issued by: Pilot
Conditions of release: The black box of the Skat-4 helicopter was found and decrypted
Passage: The guide does not know the road to Pripyat, and sends us to the Jupiter plant for documents. We enter the plant territory through the central entrance, turn right and go into the administrative building. In the room on the third floor we find a folder with an order. Documents found in the administrative workshop speak of the evacuation of the production complex from the plant territory. Information about this should be sought in the laboratory building. There, on the third floor, there is a corridor-transition to another building, after which we turn left and find a notebook sheet on the shelf, which talks about a certain product No. 62. Judging by the recording from the laboratory workshop, the evacuation should have been carried out by the delivery department. Need to check this place out. We leave the building and move further from the entrance. In the next building on the first floor there will be a sheet with the supply of this very product. Now we go to the repair shop. We go around the main building and go through the southern gate, go down into small underground corridors and exit into the main building. There will be two Chernobyl dogs. On the table we find another document, which says that we need to go to the first department, where we find evidence that the underground route to Pripyat exists. The chemical compounds workshop should have information about the conservation of the Pripyat-1 underground overpass using some kind of gas. Therefore, we return the same way we went to the repair shop. Those who are not yet tired of running around an abandoned factory in search of a document move on. The entrance to the underground overpass is located behind the transport gateway. You need to check this place and look for any information about the overpass there. Finally, when we have collected all the documents, we go to the technician Azot on Yanov, where he will tell us about the underground passage to Pripyat.
Tips: Before leaving the plant, go to the third floor of the administrative building to get more documents. They carry purely administrative information, but they are guarded by mercenaries, whose leader on the PDA has some interesting information. Take all the documents found to the leader of the debtors, you can get the “Information Merchant” achievement. But take administrative information to the scientists’ camp. For it you will be paid 7000 _ medicines, and for Black’s PDA 2500.
Pripyat-1 _ Check point "B28"
Description: We need to get to Pripyat
Quest given by: Pilot, Zulu, Azoth
Conditions of issue: Completed the Path to Pripyat quest
Walkthrough: First you need to get a suit with a closed breathing system. The most convenient and fastest option is to buy it from Hawaiian in Janow. Azot could open the gateway of the Pripyat-1 overpass, but he refuses to go to the territory of the Jupiter plant without security and recommends taking a couple of soldiers with him to the overpass. Zulu has already joined the detachment. He offers to send new fighters to him. The more quests you complete, the more characters you can take with you.
Zulu says that at least three people are needed for the trek. With the total, I got a maximum of 5 people: Vano, Tramp, Lieutenant Sokolov, Zulu, Azot. In the dialogue with Zulu there is also a thread that talks about Noah, but if you come to him on Zaton, he will not have a dialogue related to the trip to Pripyat. Maybe a patch will fix it. Let's start gathering the team. Every stalker will need a suit with a closed breathing system. Let's go to Vano first, although it makes no difference who we take first. We need to borrow 5,000 for a suit, after which we take him to Zulu. The Tramp has no problems with the suit, since he still has the old monolith suit.
But Lieutenant Sokolov doesn’t have a suit and will have to ask Ozersky. But as always, you won’t get anything just like that. You need to complete the task and bring the scientists a sample of an anomalous plant at the edge of the quarry. When you bring it, you can go to the Zulu.
By the way, if you have previously completed all the tasks of the scientists, then you will be given the rank “Discoverer”, and when you bring all three to the Zulu, then another achievement awaits you - “Leader”. When everyone is assembled, Azoth opens the door to the Jupiter subway .Next, the most important thing is to make sure that no one from your team dies. You will remember this underground passage for a long time. All the way to the large hall, snorks will attack. Use the grenade launcher and use both weapon slots. Next, you will need to turn on the power to the door. We climb onto the transformer along the stairs and turn on the power. Monoliths will run out from the side of the containers. The power is on, but the door is still locked. We need to go to the Control Room.
When we enter, two snipers appear on opposite sides of the hall, and several more Monoliths come from the direction from which we came. We press the lever and go to the opened door. Then we go along the corridor, shooting jerboas, zombies and snorkels. It's impossible to get lost. We reach the stairs that lead to the ventilation hatch upstairs, and here we are in Pripyat. After loading the location, watch a short video on the engine, after which we appear in front of Kowalski.
Unknown weapon
Description: Find the weapon that the Monoliths used to shoot down the helicopter with the military.
Reward: Gauss Cannon, Yellow Key Card
Walkthrough: Together with Captain Tarasov we go to the hospital. We take our places in the building and wait for the three Monoliths to walk into the center of the courtyard. We quickly take them off and go search the bodies. At this moment, the rest of the Monoliths, who ambushed us, begin to attack. Our goal is to Kill the Monolith, on the edge of the roof of a five-story building, which stands with a gauss cannon. After all the Fanatics are dead, we take the secret weapon and return to Kowalski. But the sample Gauss gun is damaged, we need to find a mechanic to fix it. We go to Cardan on Zaton. When we tell him about product No. 62, he passes out and it’s boring to wait until he comes to his senses :)
During the dialogue, we learn that Cardan previously worked at the Jupiter plant, with this particular product. For repairs, he needs documentation, we get an old magnetic key card and go to the Iron Forest anomaly, there will be a coded door in the building nearby. This is where the key card comes in handy. We go down to the testing workshop, there will be about 5 zombified stalkers in the corridor, we go down even lower, we find ourselves in a hall with a huge shield mounted on rails. Personally, it was in this place that I first met the pseudo-giant. He is quite clumsy, but it is very difficult to penetrate him with bullets. Stock up on armor-piercing, shotgun and grenade launcher charges. But it's better if you take something heavier.
We go up the stairs, then along the upper pipe we climb through the hole into the ventilation shaft (remember the old friend Freeman) and climb out into the second hall. The necessary documents will be on the table, and next to it is a sample of product number 62. We receive a yellow key card from Laboratory X8. Now you need to get out and return to Cardan in Skadovsk. We give the documents, wait until he gets angry, and at the same time repairs the Gaussian. At this time you can sleep. We get up, take the weapons and documentation and go to Lieutenant Colonel Kovalsky in Pripyat.
Tips: In the testing workshop you will find AK cartridges on the shelves.
Missing reconnaissance group
Description: The reconnaissance group sent by Kowalski disappeared after a strange communication session. You need to find them and find out what happened.
Quest given by: Lieutenant Colonel Kovalsky
Issue conditions: A strange signal was received on the radio.
Walkthrough: We go to the target: just west of the hostel in Pripyat. In the clearing we find the dead bodies of the group.
Monolith Cluster
Description: It is necessary to destroy all the “Monolithians” settled in the building. Their concentrations pose a threat to the military camp.
Quest given by: Lieutenant Colonel Kovalsky
Walkthrough: We meet with Vano and Sokolov (if they reached Pripyat) near the Friendship of Peoples monument and go to clear out the Books store. We go inside, in a closed room the Monolithians will sit in a trance and talk to the monolith through a strange structure. We quickly kill the fanatics before they wake up and inspect the structure.
Tips: After everything, bring Vano and Sokolov to the base alive.
The missing sentry
Description: One of the military men has disappeared from his post, we need to find him and find out the reason for the disappearance.
Quest given by: Lieutenant Colonel Kovalsky
Conditions of issue: Missing reconnaissance group found
Walkthrough: We have a mark on the map where we need to go, so we head to the grocery store. Before we even reach the right place, we hear screams and shots. A sentry shoots someone. We approach him and he kills himself in panic..... A few seconds later we discover the reason - the controller took him by the brains. We kill the controller and contact Kowalski via radio.
Tips: One or two shots from the Gauss Cannon are enough to kill the controller.
One shot
Reward: SVD _ cartridges
Walkthrough: Passing by Garik, he will tell you about the Mercenaries whom he led to Pripyat, and how they wanted to kill him. We go to Kowalski, tell him about the Mercenaries, and all the information you received earlier. And here we have 2 actions to choose from:
1) Remove the leader of the mercenaries, then they will be disorganized and will no longer be a problem. But then we won’t know who the customer was. I suggest choosing the second option
2) Remove both the customer and the mercenaries. Kirilov takes us to the point, we are given SVD and cartridges, although I preferred to use the Gauss. We are waiting for everyone to gather in front of the entrance. Main targets: mercenary leader "Jackal" and customer "Serbin" dressed as environmentalists. We remove two goals. You can kill the others if you have time before they run away.
We go to the corpses, search Serbin, take the Red key card from Laboratory X8. After this, we return to Kowalski and report the situation.
Tips: It is better to complete the quest during the day or with a weapon that has NVG installed.
Laboratory x8
Description: The information found points to the central laboratory under the symbol X8. There may be information about secret experiments conducted in the Zone.
Conditions of issue: Documents were found in the workshop with product No. 62
Walkthrough: Heading to the Yubileiny KBO. We take as many cartridges, first aid kits, etc. as possible in advance. The mission will not be easy. On the first floor we approach the elevator, it is de-energized, we need to turn on the generator. We go up the stairs. There are 26 living creatures on the indicator. As we move to the top floor, we kill crowds of zombies and monoliths. On the fifth floor, near the elevator door, you will find the PDA of the mercenary Barchuk, which says that the generator is located on the sixth service floor. We start the generator, climb into the elevator and go down to laboratory x8.
We go down and open the door using the access card. Right there, on the right, there will be a closed door with the sign that no outsiders are allowed to enter. This is where you need the red key card. You open the door, inside there is an arsenal of weapons and medicine. We go into the classroom, on the path of the electrical anomaly, go down the stairs, on the table there is a blue notebook with notes about the experiment. We take it and return to the entrance. We go to the dining room, on the way you will meet two snorks - don’t be alarmed, it’s still early.
We go up one flight of stairs and enter the dining room. A child is heard crying. In the men's room on the right you will find Burer, who lacks communication and is crying from loneliness. While having fun, do not forget to monitor your stamina, otherwise you will find yourself without a weapon. At the end of the room you will find research documents. We return to the entrance again. We go down to the laboratory. But we don’t turn left down, but go up the right stairs. There will be a poltergeist sitting there, who has been diligently pestering us all this time, and there will also be an RP-74 machine gun. Now let's go down to the laboratory. Next to the rainbow aggression suppressor model on the shelf you will find another document. Total 3.
Be careful, there will be jerboas there that can easily drive you into subtle anomalies. In the room with two large tanks on the control panel there will be an order for transfer, and a little further - an anabiotic that allows you to survive the release. Now we go down, go into the right elevator shaft and go up, when we see open doors on the floor we jump over there. There will be three Burers in the hall. I don't know what you will do with them if you don't have a gauss gun. Because if that’s the case, then you’ll be here for a long time). Well, when you kill them, you take the two remaining documents. And two more anabiotics.
Now, just as we came here, we return - by elevator. Oh yes, I almost forgot. You won't leave there until you kill the controller. As soon as you get out, run to Kovalenko’s laundry room for a face-to-face conversation. In total, you should have 6 documents from the x8 laboratory with you.
Tips: On the roof of the Yubileiny KBO, you can find two snowflake artifacts (although others are possible).
Radio interference
Description: Find and destroy the source of interference.
Quest given by: Kovalsky
Conditions of issue: Passed laboratory x8
Walkthrough: We go to the courtyard just south of the school, search the soldier’s corpse, take explosives with a timer. After this, we contact Kovalsky by radio, the Lieutenant Colonel says that they have found the exact location of the signal - it is coming from the kindergarten. We head there, place explosives on the door and quickly retreat to a safe distance.
After the explosion, we can already get inside. We go up to the second floor and go to the western wing. There will be a poltergeist there. When we get to the west wing, we will see the installation, this is the source of interference. We receive the task of destroying him. throw a few f1 grenades there.
After destruction, we hear some kind of knocking sound coming from below. You need to check the source of the sound. We open the refrigerator and find the missing military man there, after which we go talk to Kowalski.
Unknown _ Squad "Scat": Find out the cause of helicopter crashes
Description: Kirilov detected a strange signal not far from the base. You need to check the signal source.
Quest given by: Kovalsky
Conditions of issue: Completed the quest Radio Interference
Walkthrough: We go to the signal, south of the hostel. We arrive at the place, the signal begins to move - we run after it. It turns out that the signal came from underground. Now we need to return to base. As soon as we are on site, we watch a video on the engine: a shooter comes to us, tells us the general situation, as well as the reasons for the helicopter crash.
Evacuation
Description: Final mission to evacuate the train outside the Zone
Quest issued by: SBU Headquarters
Conditions of issue: The cause of the helicopter crash is known
Walkthrough: You need to wait out the ejection. At this time, you can talk to Strelok, give him the documents (if you collected them). After the release, you will contact the command and receive a task to evacuate the train. There is time until the next release.
First, you need to talk to Kowalski. The command is interested in the information that Strelok knows, so on the way to the helicopters, we should cover him. Then we move through the city, teeming with enemies, to the Prometheus monument - evacuation point "B28". Make sure that key characters are not killed.
First, you will come across zombies on the road, then mutants, and near the cinema there will be a whole raid of Monoliths. On the way, we still need to bring the medic to his senses, it looks like the controller covered him pretty badly... We are approaching the monument and need to hold out near the helicopters. Crowds of Monoliths are running towards us, snipers are shooting from the roofs. But we waited until the helicopters took off. And here we have a choice: stay in the game in freeplay mode, or fly away with the military and watch the ending of the game, I stayed and completed additional tasks for a long time, at any time you can end the game by going to the conductor and selecting the desired request, this function appears when all the main actions were completed and the game was completed, but we decided to stay... Printable version of the page:Read and watch all the latest about games Walkthrough of the Stalker Call of Pripyat storyline
"Scat 5" - Explore the crash site
Description: Explore the crash site of the Skat-5 helicopter
The quest gives: --
Terms of issue: --
Reward: --
Walkthrough: One of the first story quests. Everything is simple here, we need to get to the helicopter, which is located inside the “Swamp” anomaly and search it. I don't think there will be any particular difficulties. The passage to the Anomaly is free, the main thing is not to run into hungry dogs or anyone else. After searching the helicopter, it turns out that all the electronics inside have burned out and now you need to find the cause of the burned out electronics. We will find the reason by completing another quest, so we're done with this for now.
Adviсe: In an anomaly, use a bolt to make a road. Near the helicopter you will find some provisions in a box."Scat 2" - Explore the crash site
Description: Explore the crash site of the Skat-2 helicopter
The quest gives: --
Terms of issue: --
Reward: --
Walkthrough: So, we searched Skat-5, we run further, to the second helicopter, to the very edge of the map to the South-West, right near the “Iron Forest” anomaly. A poltergeist is flying near our target, so we move slowly, as it reacts to the movements of the GG. We kill the poltergeist and can search the Helicopter. Another screensaver on the engine, in which Degtyarev (GG) discovers that the crew of this helicopter died in the air, but on the on-board computer they managed to find maps of the area between Zaton and Jupiter. Adviсe:We search the nearby corpses of military men, collect cartridges, etc. If a poltergeist notices you, it will throw objects, hide behind corners and various shelters.
Area maps: Find interested people
Description: Find someone who will be interested in the maps you find
The quest gives: --
Terms of issue: The Skat-2 helicopter was found and inspected
Reward: Discount for moving between locations
Walkthrough: We go to the cargo ship Skadovsk, talk to a stalker named Pilot, and invite him to take the cards. He copies them onto his PDA. Now we know that there is a shortcut between Yanov station and Skadovsk. They gave us maps of the area and got the opportunity to travel cheaply between locations. Adviсe: --

Description: Explore the crash site of the Skat-3 helicopter The quest gives: --Terms of issue: --Reward: Walkthrough: We can’t just get to the third helicopter, so we’ll go to Stalker Noah, who lives in his “ark”, just south of the port cranes. In his ship he keeps a tamed dog, Lassie. We talk to him, ask about helicopters and agree that he will take us to the Plateau. We appear on a burnt out farm, there are a lot of “Zharka” anomalies around, we follow which road Noah is walking on, then we follow him. Don't forget about the bolts! We reach the edge, push off and jump into the “Teleport”. (Attention - accelerate well, otherwise you will have to jump again) Teleport near the "Circus" anomaly, and go to the Plateau. There is a lair of snorks near the target, so it’s better to destroy them first before they do this to us). After that, we go to inspect the Skat-3 helicopter. We receive information that both engines failed during the flight, and in the on-board computer we find a map with marks of evacuation points “B2”, “B28”, “B205” Adviсe: Staying in the anomaly for a long time. Frying will greatly damage your suit.
Evacuation places: Check point "B2"
Description:
The quest gives: --
Terms of issue: Skat-3 inspected
Reward: --
Walkthrough: We return to Skadovsk, talk with Boroda, who refutes the information about the appearance of the military here.
Evacuation places: Check point "B205"
Description: The map found by one of the helicopters showed evacuation points. You should check to see if the military was there.
The quest gives: --
Terms of issue: --
Reward: --
Walkthrough: We are heading to the Volhoa air defense missile system at the location Vicinity of Jupiter. There are a lot of zombies in that area, so it is better to take a shotgun or other effective weapon. We go into the building, in one of the rooms we find on the table a note from Sokolov with the content: “An old sheet with a schedule of posts; four numbers are visible on the bottom: “1421.” On top of the old notes it is written in marker: “Lieutenant Sokolov V.I. In connection with the helicopter crash, proceeded to the evacuation point B205. Within two days, the evacuation did not take place; further stay at the point is associated with an unjustified risk. Decided to leave the point and proceed to the mobile laboratory of the scientific expedition. The laboratory is located northeast of the evacuation point." Code 1421 will be useful to us, we go down to the basement, to the closed door, enter the code. (although we don't actually need to enter the code). Below there will be a flock of jerboas, and in the large room there will be a fight with Burrer. Try to dodge the objects he throws, and also hide behind large boxes. Next, climb up the stairs and find yourself in a room, closed from the inside with a small arsenal. There is also a rocket launcher and two shells for it. The task is completed, all that remains is to search point B28.
Explore the crash site of the Skat-1 helicopter
Description: Explore the crash site of the Skat-1 helicopter
The quest gives: --
Terms of issue: --
Reward: --
Walkthrough: Location Neighborhood of Jupiter. We go to the helipad. The passage is blocked by a minefield. But the helicopter can be reached along the fence. We approach, inspect, pick up the Black Box and take it to Azot on Yanov. He says that decryption can take about three hours, and the money will come out to a decent amount. So, we wait three hours and approach Azot. We give him three thousand and listen to the received audio recording, which says that in the event of an accident, everyone should go to evacuation point B28.
Explore the crash site of the Skat-4 helicopter
Description: Explore the crash site of the Skat-4 helicopter
The quest gives: --
Terms of issue: --
Reward: --
Walkthrough: We enter the factory building through the southern gate, along underground corridors we find ourselves in a hall with a destroyed roof. It will be difficult not to notice a fallen helicopter. We examine it, but don’t find out anything particularly valuable.

Description: Judging by the records from the “black box” of one of the helicopters, the military was supposed to gather at the evacuation point “B28”. It is located in Pripyat: that’s what the maps found in another helicopter say, anyway. You will have to look for an opportunity to get there - you need to talk about it with the conductor.
The quest gives: Pilot
Terms of issue: The black box of the Skat-4 helicopter was found and decrypted
Reward:
Walkthrough: The guide does not know the way to Pripyat, and sends us to the Jupiter plant for documents. We enter the territory of the plant through the central entrance, turn right and go into the administrative building. In the room on the third floor we find a folder with an order. Documents found in the administrative workshop speak of the evacuation of the production complex from the plant territory. Information about this should be sought in the laboratory building. There, on the third floor, there is a corridor-transition to another building, after which we turn left and find on a shelf a notebook sheet that talks about a certain item No. 62. Judging by the recording from the laboratory workshop, the evacuation should have been carried out by the delivery department. Need to check this place out. We leave the building and move further from the entrance. In the next building on the first floor there will be a sheet with the supply of this very product. Now we go to the repair shop. We go around the main building and go through the southern gate, go down into small underground corridors and exit into the main building. There will be two Chernobyl dogs. On the table we find another document, which says that we need to go to the first department, where we find evidence that an underground route to Pripyat exists. The chemical compounds workshop should have information about the conservation of the Pripyat-1 underground overpass using some kind of gas. Therefore, we return the same way we went to the repair shop. Those who are not yet tired of running around the abandoned plant in search of a document move on. The entrance to the underground overpass is located behind the transport gateway. You need to check this place and look for any information about the overpass there. Finally, when we have collected all the documents, we go to the technician Azot on Yanov, where he will tell us about the underground passage to Pripyat.
Adviсe: Before leaving the plant, go to the third floor of the administrative building to get more documents. They carry purely administrative information, but they are guarded by mercenaries, whose leader on the PDA has some interesting information. Take all the documents found to the leader of the debtors, you can get the “Information Merchant” achievement. But take administrative information to the scientists’ camp. For it you will be paid 7000 + medicines, and for Black’s PDA 2500.

Description: Need to get to Pripyat
The quest gives: Pilot, Zulu, Azoth
Terms of issue: Completed the Path to Pripyat quest
Reward: --
Walkthrough: First you need to get a suit with a closed breathing system. The most convenient and fastest option is to buy it from Hawaiian in Janow. Azot could open the gateway of the Pripyat-1 overpass, but he refuses to go to the territory of the Jupiter plant without security and recommends taking a couple of soldiers with him to the overpass. Zulu has already joined the detachment. He offers to send new fighters to him. The more quests you complete, the more characters you can take with you. Zulu says that at least three people are needed for the trek. With the total, I had a maximum of 5 people: Vano, Tramp, Lieutenant Sokolov, Zulu, Azot. In the dialogue with Zulu there is also a thread that talks about Noah, but if you come to him on Zaton, he will not have a dialogue related to the trip to Pripyat. Maybe a patch will fix it. Let's start gathering the team. Every stalker will need a suit with a closed breathing system. Let's go to Vano first, although it makes no difference who we take first. We need to borrow 5,000 for a suit, after which we take him to Zulu. The Tramp has no problems with the suit, since he still has the old monolith suit. But Lieutenant Sokolov doesn’t have a suit and will have to ask Ozersky. But as always, you won’t get anything just like that. You need to complete the task and bring the scientists a sample of an anomalous plant at the edge of the quarry. When you bring it, you can go to Zulu. By the way, if you have previously completed all the tasks of the scientists, then you will be assigned the rank “Discoverer”, and when you bring all three to Zulu, then another achievement awaits you - “Leader” .When everyone is assembled, Azoth opens the door to Jupiter's underground. Next, the most important thing is to make sure that no one from your team dies. You will remember this underground passage for a long time. All the way to the large hall, snorks will attack. Use the grenade launcher and use both weapon slots. Next, you will need to turn on the power to the door. We climb onto the transformer along the stairs and turn on the power. Monoliths will run out from the side of the containers. The power is on, but the door is still locked. We need to go to the Control Room. When we enter, two snipers appear on opposite sides of the hall, and several more Monoliths are coming from the direction from which we came. We press the lever and go to the opened door. Then we go along the corridor, shooting jerboas, zombies and snorkels. It's impossible to get lost. We reach the stairs that lead to the ventilation hatch upstairs, and here we are in Pripyat. After loading the location, watch a short video on the engine, after which we appear in front of Kowalski.

Description: Find the weapon that the Monoliths used to shoot down the helicopter with the military.
The quest gives: Lieutenant Colonel Kovalsky.
Terms of issue: --
Reward: Gauss gun, yellow key card
Walkthrough: Together with Captain Tarasov we go to the hospital. We take our places in the building and wait for the three Monoliths to walk into the center of the courtyard. We quickly take them off and go search the bodies. At this moment, the rest of the Monoliths, who ambushed us, begin to attack. Our goal is to Kill the Monolith, on the edge of the roof of a five-story building, which stands with a gauss cannon. After all the Fanatics are dead, we take the secret weapon and return to Kowalski. But the sample Gauss gun is damaged, we need to find a mechanic to fix it. We go to Cardan on Zaton. When we tell him about product No. 62, he passes out and it’s boring to wait until he comes to his senses :)
During the dialogue, we learn that Cardan previously worked at the Jupiter plant, with this particular product. For repairs, he needs documentation, we get an old magnetic key card and go to the Iron Forest anomaly, there will be a coded door in the building nearby. This is where the key card comes in handy. We go down to the testing workshop, in the corridor there will be about 5 zombified stalkers, we go down even lower, we find ourselves in a hall with a huge shield mounted on rails. Personally, it was in this place that I first met the pseudo-giant. He is quite clumsy, but it is very difficult to penetrate him with bullets. Stock up on armor-piercing, shotgun and grenade launcher charges. But it's better if you take something heavier.
We go up the stairs, then along the upper pipe we climb through the hole into the ventilation shaft (remember the old friend Freeman) and climb out into the second hall. The necessary documents will be on the table, and next to it is a sample of product number 62. We receive a yellow key card from Laboratory X8. Now you need to get out and return to Cardan in Skadovsk. We give the documents, wait until he gets angry, and at the same time repairs the Gaussian. At this time you can sleep. We get up, take the weapons and documentation and go to Lieutenant Colonel Kovalsky in Pripyat.
Adviсe: In the testing workshop you will find AK cartridges on the shelves.
Missing reconnaissance group
Description: The reconnaissance group sent by Kowalski disappeared after a strange communication session. You need to find them and find out what happened.
The quest gives: Lieutenant Colonel Kovalsky
Terms of issue: A strange signal was received on the radio.
Reward: --
Walkthrough: We go to the target: just west of the hostel in Pripyat. In the clearing we find the dead bodies of the group.
Monolith Cluster
Description: It is necessary to destroy all the “Monolithians” settled in the building. Their concentrations pose a threat to the military camp.
The quest gives: Lieutenant Colonel Kovalsky
Terms of issue:
Reward:
Walkthrough: We meet with Vano and Sokolov (if they reached Pripyat) near the Friendship of Peoples monument and go to clear out the Books store. We go inside, in a closed room the Monolithians will sit in a trance and talk to the monolith through a strange structure. We quickly kill the fanatics before they wake up and inspect the structure.
Adviсe: After everything, bring Vano and Sokolov to the base alive.

Description: One of the military men has disappeared from his post, we need to find him and find out the reason for his disappearance.
The quest gives: Lieutenant Colonel Kovalsky
Terms of issue: Missing reconnaissance team found
Reward:
Walkthrough: We have a mark on the map where we need to go, so we head to the grocery store. Before we even reach the right place, we hear screams and shots. A sentry shoots someone. We approach him and he kills himself in panic..... A few seconds later we discover the reason - the controller took him by the brains. We kill the controller and contact Kowalski via radio.
Adviсe: One or two shots from the Gauss Cannon are enough to kill the controller.
One shot
Description:
The quest gives:
Terms of issue:
Reward: SVD + cartridges
Walkthrough: Passing by Garik, he will tell you about the Mercenaries whom he led to Pripyat, and how they wanted to kill him. We go to Kowalski, tell him about the Mercenaries, and all the information you received earlier. And here we have 2 actions to choose from:
1) Remove the leader of the mercenaries, then they will be disorganized and will no longer be a problem. But then we won’t know who the customer was. I suggest choosing the second option
2) Remove both the customer and the mercenaries. Krilov takes us to the point, we are given SVD and cartridges, although I preferred to use the gauss. We are waiting for everyone to gather in front of the entrance. Main targets: mercenary leader "Jackal" and customer "Serbin" dressed as environmentalists. We remove two goals. You can kill the others if you have time before they run away.
We go to the corpses, search Serbin, take the Red key card from Laboratory X8. After this, we return to Kowalski and report the situation.
Adviсe: It is better to complete the quest during the day or with a weapon that has NVG installed.
Laboratory x8
Description: The information found points to the central laboratory under the symbol X8. There may be information about secret experiments conducted in the Zone.
The quest gives: --
Terms of issue: Documents were found in the workshop with product No. 62
Reward: --
Walkthrough: We are heading to the Yubileiny KBO. We take as many cartridges, first aid kits, etc. as possible in advance. The mission will not be easy. On the first floor we approach the elevator, it is de-energized, we need to turn on the generator. We go up the stairs. There are 26 living creatures on the indicator. As we move to the top floor, we kill crowds of zombies and monoliths. On the fifth floor, near the elevator door, you will find the PDA of the mercenary Barchuk, which says that the generator is located on the sixth service floor. We start the generator, climb into the elevator and go down to laboratory x8.
We go down and open the door using the access card. Right there, on the right, there will be a closed door with the sign that no outsiders are allowed to enter. This is where you need the red key card. You open the door, inside there is an arsenal of weapons and medicine. We go into the classroom, on the path of the electrical anomaly, go down the stairs, on the table there is a blue notebook with notes about the experiment. We take it and return to the entrance. We go to the dining room, on the way you will meet two snorks - don’t be alarmed, it’s still early.
We go up one flight of stairs and enter the dining room. A child is heard crying. In the men's room on the right you will find Burer, who lacks communication and is crying from loneliness. While having fun, do not forget to monitor your stamina, otherwise you will find yourself without a weapon. At the end of the room you will find research documents. We return to the entrance again. We go down to the laboratory. But we don’t turn left down, but go up the right stairs. There will be a poltergeist sitting there, who has been diligently pestering us all this time, and there will also be an RP-74 machine gun. Now let's go down to the laboratory. Next to the rainbow aggression suppressor model on the shelf you will find another document. Total 3.
Be careful, there will be jerboas there that can easily drive you into unnoticeable anomalies. In the room with two large tanks on the control panel there will be an order for transfer, and a little further - an anabiotic that allows you to survive the release. Now we go down, go into the right elevator shaft and go up, when we see open doors on the floor we jump over there. There will be three Burers in the hall. I don’t know what you will do with it if you don’t have a gauss gun. Because if that’s the case, then you’ll be here for a long time). Well, when you kill them, you take the two remaining documents. And two more anabiotics.
Now, just as we came here, we return - by elevator. Oh yes, I almost forgot. You won't leave there until you kill the controller. As soon as you get out, run to Kovalenko’s laundry room for a face-to-face conversation. In total, you should have 6 documents from the x8 laboratory with you.
Adviсe: On the roof of the Yubileiny KBO, you can find two snowflake artifacts. (although others are possible)

Description: Find and destroy the source of interference.
The quest gives: Kowalski
Terms of issue: Completed laboratory x8
Reward: --
Walkthrough: We go to the courtyard just south of the school, search the soldier’s corpse, take explosives with a timer. After this, we contact Kovalsky by radio, the Lieutenant Colonel says that they have found the exact location of the signal - it is coming from the kindergarten. We head there, place explosives on the door and quickly retreat to a safe distance.
After the explosion, we can already get inside. We go up to the second floor and go to the western wing. There will be a poltergeist there. When we get to the west wing, we will see the installation, this is the source of interference. We receive the task of destroying him. throw a few f1 grenades there.
After destruction, we hear some knocking sound coming from below. You need to check the source of the sound. We open the refrigerator and find the missing military man there, after that we go talk to Kowalski
Unknown + Squad "Scat": Find out the reason for the helicopter crashes
Description: Kirilov detected a strange signal not far from the base. You need to check the signal source.
The quest gives: Kowalski
Terms of issue: Completed the quest Radio Interference
Reward:
Walkthrough: We go to the signal, south of the hostel. We arrive at the place, the signal begins to move - we run after it. It turns out that the signal came from underground. Now we need to return to base. As soon as we are on site, we watch a video on the engine: a shooter comes to us, tells us the general situation, as well as the reasons for the helicopter crash.
Evacuation
Description: The final mission to evacuate the train outside the Zone
The quest gives: Head of the SBU
Terms of issue: The cause of helicopter crashes is known
Reward:
Walkthrough: You need to wait out the ejection. At this time, you can talk to Strelok, give him the documents (if you collected them). After the release, you will contact the command and receive a task to evacuate the train. There is time until the next release.
First, you need to talk to Kowalski. The command is interested in the information that Strelok knows, so on the way to the helicopters, we should cover him. Then we move through the city, teeming with enemies, to the Prometheus monument - evacuation point "B28". Make sure that key characters are not killed.
First, you will come across zombies on the road, then mutants, and near the cinema there will be a whole raid of Monoliths. On the way, we still need to bring the medic to his senses, it looks like the controller covered him pretty badly... We are approaching the monument and need to hold out near the helicopters. Crowds of Monoliths are running towards us, snipers are shooting from the roofs. But we waited until the helicopters took off. And here we have a choice: stay in the game in freeplay mode, or fly away with the military and watch the ending of the game. It is generated depending on the number of quests completed, as well as how you completed them.
Congratulations, the game Stalker: Call of Pripyat is completed. But rest assured, there is still a lot of interesting things left in the Zone!
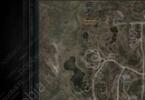
Actually, now it’s time to go to the crash site of the Skat-1 helicopter. According to the information we know, it crashed on the Helipads in the southern part of the location. Let's tighten the belts and go on our way.
As soon as we arrive at the place, we will reduce the speed. Do we see the "Mines" sign? Believe me, they exist and we are not deluded at all just because they are not visible: the talents of military thought have rolled mines under the asphalt, and now they will detonate in some unreal way if you step on them. There is a way out though.
Option 1.
We approach the first stick sticking out of the ground, did we get there safe and sound? So it worked. And so we move from stick to stick until we reach the helicopter.
Option 2.
We take out the bolt and throw it where we intend to go. If you hear a click, there is a mine in front. If there is silence, it means the path is clear. We approach the bolt and throw it again. Therefore, you can walk to the helicopter while keeping your arms and legs with you.
In the minefield we see a dead military man, apparently he was blown up by a mine, but for some reason he suffered the damage that mines give after the explosion. We search and take away everything he has.

Well, we reached the helicopter safe and sound Scat-1 crash site.


After examining the helicopter, we find a black box. We are offered to take his equipment for decryption. There is nothing else interesting at the turntable, and you can leave. We're not in a hurry though. Do you see a lot of pigs and wild boars?

Don't waste ammo on them, just watch. Do you have popcorn with you? No? Okay, let's chop up the loaf and eat it while watching the pigs start exploding in the minefield. Hmmm, the effects are rather weak. And why the hell did the piglets come here?


It’s a pity, of course, but despite all the above, what a quantity of free stew! We'll roll up a couple of cans on the spot and hit the road, remembering to check the road with bolts, otherwise later they will make stew out of our scraps.

Having avoided the minefield, you can sigh serenely and move on.
Walkthrough of the main storyline
Skat-1: explore the crash site
Located on the helipad in the southern outskirts of Jupiter. The passage is covered by a minefield, but you can pass either by throwing bolts forward (if there is no click, it means it’s empty), or along a concrete fence. Still, it’s better to get medical treatment and keep a first aid kit and bandage ready, because... There are still a couple of mines lying next to the fence, you can hook them. After inspecting the helicopter, wild boars and flesh will run through the minefield. It is in your hands to help them not to reach. Give the black box found in the helicopter to Azoth and wait three hours. He will decipher it, for which he will ask for 3,000 rubles (the amount may be less if you performed any tasks for Azot).
Skat-2: explore the crash site
The helicopter crashed in the lower left corner of the map. There are no difficulties with its research, except for poltergeists. This is a kind of glow flying around the power plant. Follow the route and choose a place to shoot further away, but so that the monster is in sight. You only need to move in his presence on your haunches, otherwise he will start throwing all kinds of garbage at you. After you start shooting, don’t move, just keep shooting, sooner or later the monster will fall. Now you can walk here freely. Examine the helicopter and three corpses around. Show the map to the conductor in Skadovsk, now his services are much cheaper.
Skat-3: explore the crash site
After completing Noah's quest, go to the helicopter. Examine it. At the same time, you can clear the caves that are nearby - there are two corpses of military men there. The third was located right next to the helicopter. Let's get the coordinates of three evacuation points.
Skat-4: explore the crash site
The helicopter fell on the roof of the Jupiter plant workshop. A trip there can be postponed for the time being, so that later you can complete several quests at once. The entrance to the factory is not difficult to find; the entrance to the workshops is also located in the south-eastern corner of the square building. There is nothing complicated further - there is only one path, no branches.
Skat-5: explore the crash site
The helicopter crashed into the swamp where the Swamp anomaly was located, as well as many others. You can make your way from the west, jumping over narrow strips of water. There will be a few toxic spots, but they won't cause much damage. You can find a couple of artifacts (it’s all the more convenient to look for them here since the location of the artifact is visible while it’s on the water). Near the helicopter is a box with a small amount of supplies.
Squad "Scat": find the cause of burnt-out electronics
After inspecting all the helicopters, the quest will be finalized. There are two helicopters affected by the electrical impulse. The solution to the quest will come at the end of the game in a video; you don’t need to do anything.
Evacuation places: B2
After examining Skat-3, talk to Beard, he will say that he did not see the military here.
Evacuation places: B205
There are a lot of zombies around. This shouldn’t be a problem, so we’ll skip the similarities. In the administrative building above the bunker there is a note with a code to the door below, and a note from one of the military that he proceeded to point B28. The entrance to the weapons room behind bars is through the same bunker where there are a dozen jerboas and a burer. At a low level of difficulty, the tactics of fighting the burer are simple - get close to him as quickly as possible and hit him with a knife. If he twitches, don’t let him move even a step, otherwise he’ll hit you. On a high difficulty level, there is a chance that while you jump close to him, he will have time to kill you.
If you previously decrypted the message from the black box from Scathach-1, then this task will be canceled, but it’s still worth going.
Evacuation places: B28
This task will temporarily become inactive until the quest “The Path to Pripyat” is completed. Path to Pripyat
If you've been wandering around the outskirts of Jupiter, you can begin to advance through the plot. This quest is received in dialogue with the Pilot - the guide at the Yanov station, after decoding the black box from Skat-1 or after reading the lieutenant's note at evacuation point B205. In any case, we need to go to the factory and collect all the documentation regarding the possible route through the underground passage.
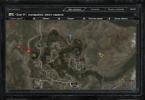
At the factory there is only one enemy - dogs. Both blind and pseudo dogs. Therefore, there is no need to be particularly afraid. Looking at the map, we can identify 4 interesting buildings (or groups of buildings):
A long building in the very north of the plant territory. Approximately in the middle is a tall administrative building. There is an administrative document on the 4th floor, part of another quest, I recommend not touching it if you are not equipped in the best way. We are interested in documents on the first floor next to the administrative building, as well as on the second floor on the left side of the building (next to the transition between buildings, upper left corner of the entire factory complex).
A little to the south, along the factory workshops, there is a long, narrow building. Here we are only interested in the notebook sheet on the second floor and the transition to the neighboring (administrative) building there.
Now you can move to the workshops - a large square building in the center. Entrance from the southeast. Further through the basement to the balcony around the room, into the next room. There is a helicopter (Skat-4) and a note not far from it on the table. Next to the helicopter there is a passage to the neighboring workshop, there, in the control room on the second floor, there is a blue magazine. All. Now the last point of the route: the most right-lowest building of all in the plant. There's a diagram of the overpass on the second floor.
NB! To the north of the building of the first department you will find a pit with several anomalies and a pipe in which there is a letter to Fang.
Take all this and show it to Azoth. Give the remaining documents to the head of Duty or Freedom. Earn the title "Information Merchant"
Pripyat-1
Zulu, between drinks, will outline the situation for you. I recommend gathering a full squad, i.e. besides Azoth and Zulu there are three more. Vano, Lieutenant Sokolov and Tramp - the leader of the Monoliths, whom you helped. Sits at Yanov station.
Vano is ready to go, but he needs a suit. His suit fits just right, but he was pawned to the Hawaiian for 5,000. We give him five thousand and accompany him to Zulu.
Next is Lieutenant Sokolov in the scientists' bunker. We talk to him, he agrees, but we need overalls. To obtain it, complete the quest “Anomalous Plant”. We take you to Zulu.
The tramp is also ready to go, and he has a suit - a Monolithic one. We take you to Zulu. You can buy a suit for yourself from the Hawaiian and upgrade it from Azoth.
When you are ready, go to Zulu and start the operation.
Snorks and jerboas are inside. The group copes quite well with shooting. Vano will show you how to bypass the anomalous field. There is only one path, there is nowhere to get lost, and besides, your comrades are rushing forward and are not waiting for you - quite unpleasant if you need to change weapons, eat sausages or change an artifact in a slot.
You won't have any problems until you enter the big hall. The road comes up against a door that just doesn’t want to open. next to it is a tower with a transformer on top, but don't rush to start it up. Inspect the container area, reload your weapon. When you launch, do not run down, shoot the Monoliths that appear from above. The path further remains closed, but the control room is now accessible. Save in front of the door - when you open it, two snipers will appear in the large hall and two more monolith squads will jump out of the corridor from which you previously came out. Snipers will be sitting under the ceiling, one to the right of the hole in the roof, the second approximately above the door where you need to go. Carefully inspect the premises under the control room - there is a SEVA jumpsuit there.
Unknown weapon
After all the conversations, Kowalski will give a task - to help the military in an ambush on a monolith, which has an unknown but very powerful weapon. We speak with the leader of the detachment and move forward. We follow the military, three Monoliths will soon appear. After killing them, you need to go search the bodies. But as soon as you approach the corpses of the fanatics, guns will start talking from all sides. The ambush was ambushed. At the very top of the building, on the edge of the roof, the commander of the monolith stands and prays. Gausska - from him. Take him out of there and finish off the rest of the ambush. If you get involved in a positional war, a lot of soldiers will die, try rushing through enemy positions with a shotgun at the ready - it will be much more effective. There are a couple of snipers on the roof - you can reach them with something long-range.
When everything is ready, go and pick up the Gauss Gun. It, together with the spiritual leader, fell onto the roof of the passage between the buildings. Take the weapon to the colonel at the base. Here you will meet Herman, who was seen at the scientific base and to whom the artifacts were given. He will repay you for your help with the Bubble artifact. Talk to the Colonel.
After your report, in which you will receive the task of going to Jupiter or Zaton and talking with the technicians there about the weapon found, the video will show you a communication session with the reconnaissance squad. And they will give you a new task.
Take the weapon to Cardan on Zaton, fortunately Garik now drives to Pripyat and back (but it’s not possible to ride a tram back and forth - each trip costs 5000).
Cardan will faint from what he sees, and you will have free time to go for a walk (or sleep) while he comes to his senses. Talk to him again. He will take the useless gun from inventory (no need to carry it around), but will give you a scratch card from the laboratory where he worked on this weapon. He needs any documentation.
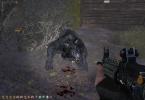
The entrance to the laboratory is in the corner of the Zatonya map, in the southwest. After entering, go down to the -1st floor, walk along the corridor (5 zombies there), at the end of the corridor go down the stairs again. A pseudo-giant awaits you here - a very strong monster. Or rather, very strong. There is no point in shooting at him, I think, unless with a pumped-up shotgun at point-blank range, but this is unlikely. The main measure of influence is hand and grenades. He will not go to the landing, so you can safely retreat there if he rushes at you. In my case, he walked back and forth, occasionally kicking the floor in a brave manner. When his death is near, he will begin to crawl, but will not stop kicking the floor. A habit, apparently.
When you fill it up, look around the hall. A ventilation shaft leads into the next room. Go to the balcony via the stairs, cross the collapsed part using the pipe on the right, then up the stairs twice, go to the other side of the room and go down one flight. Here you will need to walk quite a long distance along the same pipe near the wall. Careful and slow. Then onto the stairs and into the ventilation. There are documents and a pass to the X8 laboratory. Return the documentation and key card to Cardan, he will repair the Gauss and sell you cartridges, albeit homemade ones. They vary about the same as regular and armor-piercing weapons on any other weapon.
Missing reconnaissance group
Go to the place indicated on the map - you will find 4 corpses, which Degtyarev will inform Kowalsky about on the radio in the video. Get a new task.
The missing sentry
A sentry went missing in the department store area. At the scene of the incident, the sentry yells some kind of nonsense and shoots into the void. Then he shoots himself in the head. The reason for this behavior is immediately revealed - the controller. It is very easy to kill with a Gaussian. We watch a video about the report to the colonel.
Laboratory X8
Go to the House of Public Services, marked on the map of Pripyat. Inside, there are a dozen zombies on the second floor, and on all the remaining floors there are Monoliths, totaling about 25 or more. They are located mainly in external or central corridors. On the top floor, start the generator. The elevator now has a power source and will be able to take us to the laboratory. On the penultimate floor - the fifth, there is the corpse of some poor fellow in a scientific suit. Pick up the PDA from the corpse.
So. You went down to the laboratory. There are four doors in front of us. Classroom, cafeteria, laboratory and access to elevators. Let's go to the elevators last, and first we'll go to the poltergeist. If you noticed, he is the one who throws all sorts of nasty things at us whenever we move. If you feel sorry for the suit, crawl on your haunches. We need to go to the laboratory. Go down the stairs and you will find yourself in a room with two stairs and an anomaly in the center. We're going up the steps. When you rise, five jerboas will rush at you from behind. Don't underestimate them, take out your shotgun and throw lead at them. Now go up the stairs again (climb carefully, the poltergeist senses sharp horizontal movement very well), here take aim and shoot the reptile. All. Now you don't have to crawl like a cockroach.
Return to the laboratory entrance. First, let's go to the dining room and clean everything there, both from food supplies and from any monsters.
On the way to the dining room there will be two snorks, a hole in the floor (we don't need to go there yet) and a path to the laboratory (the room where a stream of steam blows). We don’t need to go there yet either. You can hear children crying in the dining room itself. In the men's toilet (in the dining room?! What an unexpected plot device!) a burer sits and cries from loneliness. Since he is alone, scratch him with a knife. You can eat if you are hungry. Don't forget to pick up the document.
Now let's go back to the entrance to the laboratory and go to the training part. There are two doors: an empty men's room and a reading room. It contains a moving electra and a blue folder. We take the folder for ourselves.
We go to the entrance, then to the laboratory. We have already wandered along the steps on the right (under them there is a hole where there are jerboas and some goodies), let's go down.
In the room with some water and an aggression suppressor is his performance characteristics. The jerboas will come running. In the next room (just where the stream of steam is) there are tanks below, and under it there are jerboas and all sorts of cartridges. There is a book on the control panel next to the tanks. Go further and you will see two elevators. There are stairs in the back. Go up two floors and jump through the open doors. Prepare the Gausska - there are three burers here. At the average level, one shot per burer is enough. In the room next to the red tank there is a Sample Research Report. In the room on the second floor there is another notebook and medical supplies.
If you follow this research procedure, then all the documents are collected and you can return home.
Go up one more floor in the same elevator shaft and you will find yourself near the entrance to the laboratory. And you will see the controller. He needs 2 shots from a gauss rifle. Report the completion of the task to the colonel.
Monolith Cluster
The soldiers of this faction gather in the House of Books. Kowalski gives the task to clear the area. Lieutenant Sokolov and Vano will rush to your aid. There are five Monoliths in the building's lobby, and two more in the next corridor. In the hall where the marker is, you need to quickly remove five people who seem to be sitting in a trance, but if you hesitate, they will jump up and grab their weapons. Afterwards, watch the video and go to the colonel.
One shot
Garik will give you the seed for the mission when you pass by him. His story seems to be the same as that of Uncle Yar - he contacted the mercenaries and they now want to remove the witness. It is known that they will meet with the customer in the courtyard of the hostel. Talk to Kowalski and immediately go to the scene of the future incident. They will give you an SVD and cartridges, but we hide it in our pocket and take out a gauss gun “out of our wide trousers” (or wherever you have it). It will take a dozen shots. Actually, there are two targets, but the rest will shoot at you, and from grenade launchers, and although they will not shoot very accurately, it will hurt.
So, first the mercenaries come, the main one among them is the one in an exoskeleton who walks around the perimeter of the yard. He's nervous, I guess. He does the right thing. If I were him, I would be nervous too - under the gun of a Gaussian! The second side will come later (sometimes MUCH later), we wait until the big shot in the green overalls and our condemned mercenary stand opposite each other. Then, having prayed and preserved ourselves, we open fire. First we take down, say, the mercenary, then the green one, and then everyone who moves or, God forbid, shoots, especially at you. When you're done, pick up the trophies you like, and from the corpse of the man in the overalls - a red access card. If you've already gone to X8 and seen a closed door there, right next to the entrance, this card unlocks it. There are weapons and supplies.
The colonel will say that he is giving us the SVD and will also give us ammunition for it. And a new task.
Radio interference
The colonel's group will not last long here if there is no connection with the center. It is urgent to request evacuation. But something is jamming the signal. One detachment has already set off to the indicated coordinates, but has not returned. Now it's our turn. By the way, we will find the guys who left before you, and there is a bomb on the body of one of them. They will tell us that the source has finally been identified - this is a kindergarten. The entrance can be blown up, for this you have a bomb. There are two poltergeists inside. The marker points to a strange-looking structure. Place heels of grenades next to it and it’s fine. Go down through the hole in the floor to the first floor, there are two refrigerators. In the right one sits a doctor from the military - well hidden. Together with him you get to the base and watch a couple of videos.
Unknown
You don't even have to shoot in this mission. Just follow the coordinates of the signal, it will move, follow it and watch the video. Then go to the base.
There's another cutscene, then a conversation with Strelok. Give him the notes from the caches that you previously examined (there are three in total). Get artifacts and the “Keeper of Secrets” achievement.
Wait for the end of the ejection.
After waiting, watch the videos. Repair weapons and armor, put everything unnecessary in the box. When you are ready (mentally and physically) for the final mission, talk to Kowalski.
After exiting the laundry building, you will be greeted by zombies. They will come from all directions. After entering the arch of a multi-storey building, snorks will begin to attack (for some reason they die from one or two shots), a little later more snorks and jerboas. At this point the screen will flicker and a task will appear to bring the doctor to his senses. Walk up to it and click. Next you will come to an area where there are 2 helicopters, for some reason with their engines turned off, and many, many Monoliths. Snipers on the roof, ordinary soldiers all around. Be prepared that you will not be able to complete the mission the first time. If you get to the helicopters, good. Study the road, direction and order of attack of opponents. When you dig in near the monument, pseudo-dogs will also go into battle, and a new shift of snipers will come out onto the roofs. Works: Gaussian for distant or well-armored targets, shotgun in close combat and under-barrel grenades for everything else. You can go through the mission several times, letting the Strelok, for example, or the colonel die. But the most interesting thing will, of course, be the ending, in which everyone is alive - Lieutenant Sokolov, Colonel, Strelok, you. It’s difficult to achieve this even at the normal difficulty level, but if you don’t set yourself up that everything will work out right away, it’s even interesting.
Ultimately, you will be asked whether you want to stay or fly away with the squad. If you stay, there will be a freeplay in which you can endlessly wait out emissions in a shelter, collect artifacts, kill monsters and complete additional tasks. The choice is yours.
And I say goodbye and hope to see you not in the next add-on, but in a full-fledged continuation. All the best and happy games!
Completing side quests
Mercenary camp
Trader Sych gives the task - to find out the plans of the mercenaries who settled in the southeast of Zaton. To do this, you need to steal any storage medium from them - paper or electronic.
There is only one medium - a laptop. There are two options - sneak and steal and kill everyone and steal too. The second one is easier, but not as interesting.
However, something quiet and unnoticeable can easily turn into a massacre, because... The local stealth is monstrously incomprehensible and sometimes you are noticed even through walls and other ceilings.
If you still decide to try, keep in mind that until the laptop is stolen, you should not be seen at all. Approach the fence on the east side. There is a gap in the farthest part of it. Enter the area and continue along the fence, then along the building. Don't rush to go around the corner - there is a sentry there. Wait until he turns his back to you and stops. Now walk along the embankment, walk quietly. There will be concrete pillars ahead, with a pipe above them. There is a ladder on one of the pillars. Wait until the guard goes to the other end of his route and climb inside. The pipe leads exactly to the table with the laptop, and if you have never been seen before, then you can grab the laptop and take the shortest route (and they are all approximately equal) to leave the complex. If you get away quickly, they won’t even start shooting at you.
There are other ways to get inside, but they are not as profitable. There is a network of pipes under the building, you can make your way through them. They have several inputs and outputs, but all are far from the table where the laptop lies.
Tools
Cardan asks to bring him a set of tools.
The Rough Work Kit is in the attic of the northernmost building on the map (upper left corner). There are quite a lot of zombies wandering around. Try to move at a walk, with your weapon removed - perhaps they will not attack you. This still does not play a special role, because... Zombies are a pretty weak opponent.
You will find a tool for precision work in the south of the map - in the mercenaries' courtyard. The main thing is not to wave the gun, moreover, do not take it out in the presence of these guys, because they are timid, and if you suddenly itch unbearably in the area of the holster, then let it itch, otherwise they will shoot you.
Three comrades
Cardan asks him to find his friends with whom he quarreled and apologize to them.
You will find the remains of the Joker to the south of the Sosnodub anomaly (southwest of the map).
The barge found its two meters in the catacombs to the west of Skadovsk. Bring the CCP of both figures to the inconsolable Cardan.
Inaccessible cache
A stalker named snag asks to bring him a container with swag...
... which container he hid in a Cossack, which, in turn, fell into a fault during an earthquake. The needle is in the egg, the egg is in the duck, the duck is in the hare, the hare is in shock. It is necessary to remove this box with a combination lock, and Koryaga promised to divide the swag in half.
Unload to the maximum. For this purpose, there is a box on the ship - it is yours, if you put something in there, nothing will be lost. Leave yourself more ammunition, about five first aid kits, a dozen bandages. Go to the point marked on the map and go down. Examine the Cossack, and slowly move towards the exit - you will have to find it experimentally. Snorks will appear from the darkness one at a time; it is not so difficult to bring them down if you have something to heal and bandage their wounds with. When you bring the container to its owner, the division of property will begin.
I don’t recommend taking a handicap or AK. Their price is pennies. From the rest: a helmet, an artifact and a medical kit. You shouldn't take a helmet, because... the stalker will agree to give only the helmet, and take the rest for himself. Take the artifact and medical kit. Although, of course, it's up to you to decide.
Strange phenomenon
Beard asks to find out what is shining so mysteriously on the dredger. The place is marked on the map. This is a small floating station. There is only one way inside, along the ramp to the station, then along the stairs, where you need to jump from one piece of iron to another, because... there is an anomaly below, then crawl under the pipe and climb up. Then down through the hole in the wall. Here you need to take a right and squat down to the anomaly, which can be identified with a bolt. Then go towards the pile of sand on the left. All. Go up to the second floor, then to the third, there is a modified steering wheel hanging there. You won't encounter any more anomalies on the way, but save before leaving. At the exit, a stalker will meet you and tearfully ask you to give this artifact, supposedly to treat a friend. You decide.
If you hand it in, when you come to Beard you will see how this boy hands over the art instead of you. And there is no comrade whom only an expensive and rare artifact can cure. The beard will say that he does not intend to interfere in these matters, and the boy will also laugh in your face. After leaving Skadovsk, he and his two guys will turn into ordinary NPCs, and killing them will not give you anything except equipment - absolutely standard. Let's replay.
If you decide that in the Zone it’s every man for himself, and you are far from Mother Teresa, then the guy will remain standing where he is, but as soon as you take two steps, you will be surrounded, and it will be very difficult to fight back. Therefore, I recommend not doing these two steps, but immediately after the dialogue kill the sucker with a knife. Two more sat in a lonely booth on the front left and around the corner on the front right. Throw a grenade into the booth and immediately pull out a pistol. Try to finish him off as quickly as possible. If that doesn’t work, try the pistol (I hope by this time you have already changed the standard PM to something more different). The second stalker will first run away, but then return and try to kill you. Persuade him not to do this. You can speak from the same pistol or any other weapon. Collect trophies, take the artifact to Beard. Quest completed. Get the coordinates of the cache and 3000 rubles.
Path to the plateau
The Skat-3 helicopter fell on the Southern Plateau; only a certain Noah, who lives on a barge, knows the way there. When you try to open the door, he will blow it off with a shot. Put down your weapon, carefully approach him and speak. The guy is completely out of his mind. After the cutscene, follow the route indicated by Noah, and at the end, run (default key) and jump. You will find yourself on a plateau, at the same height as the helicopter.
Find the stalker
A stalker named Soroka set up a group of another neutral - Gonta. Not only did they almost lose a comrade during the chimera’s attack, but they were also left without the promised reward - Soroka disappeared from the scene, lay down somewhere and does not show up. Owl will sell you information for 1000 rubles that this Soroka is supposedly near Jupiter, but he probably called himself by someone else’s name, and maybe even changed his uniform. Continuation of this quest - see Other people's merits.
Hitting
The bandits decided to run into the stalkers and extract the money. The Sultan reports this. We need to decide what to do. If in this conflict you decide to join the bandits, talk to Knucklebones, who is standing nearby. If you are talking to stalkers, you need to inform Beard about the impending attack. Then he will ask you to go with the bandits and stab you in the back at the decisive moment. Let's choose a side. In both cases, you will receive nice prizes and discounts: if you join the stalkers, Beard will give more money for artifacts; if you join the bandits, the goods will become cheaper in the store. The attitude of the parties towards you will not change; no one will shoot at you when you meet.
Deal
This mission will be given by Beard after completing the previous one. We need to monitor the bandits and stop them from making a deal to buy a large batch of weapons. I recommend that you first sleep until the morning and then take on the task, otherwise it will fail. Immediately after receiving it, we move to the specified area.
Talk to the main one and crawl after the stalkers. Climb inside the round building, then watch the video and attack the bandits and mercenaries. Talk to the main one again, then to Beard.
Disappearance of stalkers
A hunter was sent to a place where a large number of bloodsuckers probably live, but he still has not returned. We need to make every effort to find this hunter. Well, or what's left of it.
When you arrive at the place of investigation, Capercaillie will contact you and say that he has found something interesting. Run to the new mark on the map. Everything there is scripted, although it is quite interesting. In a battle with a bloodsucker, the main thing is not to let him go behind your back, but in general - to start going around you from the right or left. Imagine that you are standing with your back close to the wall. It’s just that the bloodsucker cannot be allowed to go behind this wall. The surest thing is to hide in a corner, after which the bloodsucker will start running along the same trajectory. It’s not difficult to figure it out and shoot the creature too. Strikes with claws should not particularly bother you if you have time to eat a first aid kit, although this depends on the difficulty level.
There are two bloodsuckers in total in the building - on the first floor in the hall to the left of the entrance and in the basement. Then follow the Capercaillie and keep up. Report what you saw to Beard.
Sych will demand 2,000 rubles for information. Let's go to the bridge. Entrance from the north. The passage across the bridge will be blocked by anomalies standing in a continuous front. In such cases, climb up and move through the pipes. You need to find two keys - in the UAZ and in the Niva that fell from the bridge. After this, you can open the box in the truck. However, you need to inspect each car, you will find weapons, ammunition and first aid kits. There are no artifacts, you don’t have to look. When you have collected all this, go to the Beard, following the message you received. There, talk to him and go to the taps. There is a shack near the indicated place, enter. Then you will understand everything yourself, I don’t want to spoil it. I’ll just tell you that you won’t have to shoot, so at the end of the dialogue, don’t strain yourself, trying to be the first to grab your weapon and shoot. Report to Beard, get a good amount of money and the title “Detective”.
Take the cylinder and carry it to the ventilation shaft. Install and open the valve, then wait 45 seconds. Perhaps you will see a couple of bloodsuckers running away from the destroyed lair. Apart from them, all the creatures are dead. If you don’t believe me, go downstairs, just keep in mind that there is poison there, you will need first aid kits. Report to Beard about the destruction of the monsters' lair.
Food for mercenaries
The mercenary commander in the south-southwest of the map will ask you to bring food to the guys. You need 6 pieces of sausage and 6 canned food.
Debts
Vano is a stalker of not quite Russian nationality. And not even Ukrainian. Vano fell for the bandits' bait: he bought a jacket in installments, and now, consider himself broke, paying interest. You need to go and talk to the leader of the gang in order to stop this disgrace.
We go to the specified address, at the entrance we say what issue we came for. Then we save. You can try all the options, but if you threaten with a weapon, the leader will ask for exactly the 5000 that Vano gave you.
Vano will not thank you in any way, but will be very useful to you when completing the quest in the future.
P.S.: if you kill the bandits, 5000 will go to you.
Hostage
The three stalkers did not share the swag with the bandits, but they dispersed, it seemed, peacefully. However, they decided to take revenge, kidnapped one of the group - Mitya, and are now demanding a ransom. You can go and cut everyone out, and it’s better to start from the middle - go to the leader, overwhelm him and those around him, and then kill everyone who comes. Before talking with Mityai, save - people can easily get stuck in the gate. When you reach the edge of the bandits’ territory, you can move with Mityai to Yanov, or let him go, leaving you to resolve some of your own issues. In any case, your reward will be a Goldfish - +12kg of carry weight.
Radio engineering
Nitrogen asks you to bring any parts related to electronics from the cement plant. You can get to the plant via several staircases next to the building. At the very top is a cache with a useful tactical helmet! Use bolts to mark anomalies and avoid touching hanging rags rooted in the ceiling. This is burning fluff. From the top floor to the penultimate one you can only get through a hole in the floor next to the frying room. Carefully go down and explore each room on each floor. Then jump behind the first floor along the broken stairs. In total, the loot will be a package of capacitors and a package of transistors, three textolite bases, 2 cans of rosin and 2 coils of wire. Now bring him coarse and fine instruments and you can improve them for almost nothing.
Tools
Nitrogen, oddly enough, also needs tools (and what, I wonder, was he working with all the time before you arrived?!)
The rough ones lie at the end of the second carriage under the bridge just south of Yanov. There is an anomaly in the carriages that moves. The entrance to the car is from the roof, where you can climb by jumping from the bridge onto the diesel locomotive. Inside the carriages, hide on the benches when the anomaly passes by.
Thin instruments lie on the second floor of one of the buildings at the Jupiter plant. From the Bitumen anomaly, follow the western road leading across the bridge (there will be bandits on the right) and ending directly in the courtyard with this building.
There are a lot of electrical anomalies there, but the path is fairly easy to mark with bolts. The tools are at the very end, in the green cabinet. The exit is nearby, there is no need to return the way you came.
Variable psi radiation
Professor Herman will ask you to find out the source of the psi-field in one tunnel. The stalkers of the Topol group agreed to cover your back from mutants. Talk to Topol. You can leave immediately. Before entering, talk to him again. In the Tunnel you will meet three zombies. After this, Topol and the guys will remain to cover the entrance, and you will go deeper. At the input is a moving electra. It flies in a circle, but you can only pass by it against the movement, because... if you go in a circle, then there is also an anomaly there. In the next room there are supplies of first aid kits, ammunition and food. The last one contains an artifact, more food, vodka, grenades, cartridges and an AK. Save before opening the door. The stalkers feel bad, the controller took them. If you hesitate, he will kill half of them, and zombify the rest, and you will have to kill them. When dealing with the controller, never run out into the open. Always have shelter nearby, because... it only attacks within line of sight. Stand next to the column and shoot him in the head with the most armor-piercing ammunition you have. It is quite possible that it will not be possible to save one stalker, because... after appearing, the controller is the first to attack him. When the others come to their senses, talk to Topol at the tunnel exit and head to the bunker.
Talk to Herman.
Anomaly Research
After the incident with the tunnel, Herman will give you another task. Get scanners from a technician. Bitumen, Concrete bath and an anomaly in the parking lot - scanners need to be placed there.
There are no problems with the abundance of electricity in the parking lot - equip the art with +6 protection from electricity and jump over it in one long jump. Maybe it won't even hit. Place the scanner, collect artifacts and get out in the same way.
With a concrete bathtub it’s generally easy - Walk up and place the scanner on the edge. You don't even need to go deep. Unless you need an artifact, which probably lies on the concrete threshold at the very end of the anomaly.
The most difficult thing is Bitumen. Put on the art to protect from high temperature and, marking the road with bolts, go to the center (there is a bush growing there). You also need to choose carefully. I entered the anomaly from the west and exited through the heat in the north. Don't forget to collect artifacts since you're here.
Now you can go report your progress to Herman.
You can take a quest from him to install two more scanners. Proceed similarly to the previous three anomaly fields, or even better, acquire Svarog.
The last thing left for the scientist to do is accompany the stalkers taking measurements. An invasion of zombies is expected (it is better to have something high-precision and long-range) and an attack by a flock of wild boars and flesh (shotgun “will do...”).
After accepting the quest, talk to Ozersky, ask why there is such security all of a sudden for taking measurements.
It doesn't matter which area to choose first. While exploring the anomaly near Kopachi, zombies will trample from there. First from the surviving building below, then to the right from behind the hill near the last building in the village. There will be several waves, which, even with a Kalash with optics, can be easily destroyed before approaching firing range.
The floodplains near the cement plant are more difficult. Mutants are fast and come in groups of three. As a rule, in turn - three boars from the southeast, three flesh from the west. It’s easier with flesh, because they are slower and die from one shotgun shot at point-blank range (meaning the upgraded shotgun of St. John's wort). Boars need 2 shots. One boar I always managed to run to the stalkers, where he was shot. Under no circumstances should he be allowed to attack stalkers - they die from one blow. When everything is finished, talk to Topol, Herman and Ozersky. The latter will say that his hypothesis has been confirmed, but another test is needed. Install the scanner in the center of Bitumen.
Hypothesis
The task is given by Ozersky after taking measurements. We have already been to the center of this anomaly, so it is not difficult to walk there again. After installing the scanner, snorks will begin to appear, and the number of deaths in anomalies will be much less than we would like. Shoot back with a shotgun - the most effective in this case. When the measurements are made, pick up the scanner, get out and bring it to Ozersky. Get award.
Latest Developments
You need to find all the documents on the latest developments of Jupiter and bring them to Herman. They are presumably located in the administrative building of the plant.
There is only one document, located clearly according to the marker on the map on the top floor of the building. As soon as you take it, a group of mercenaries led by Black will appear - the guys guarding the scientists’ camp. They will climb both stairs two or three people at a time, seven in total. When they are all dead, take the documents to Herman, and at the same time take from him the quest to find a new security group.
Abnormal Activity
Based on the results obtained from the scanners, Herman can conclude that some strange anomalous activity is observed near the Gradder, which is northwest of Janow. Upon arrival, you will hear a constantly repeating signal for help, as if someone cannot get out from somewhere and this is the second day without water. This area can only be explored with Svarog, an advanced scanner. You can get it from the quest from Owl.
As soon as you approach, an anomaly will work and six bodies of dead Dolgovtsev will fall out of the air. One of them will have a PDA telling what happened to the founder of Debt. It, the PDA, can be profitably sold to various interested parties. Commander of Duty, Freedom, bartender, etc. I recommend Debt - they will become allies, and this will be useful to you a little later in another quest.
Compass
After the quest with improved detectors, Beard invites you to search for the rarest artifact - the Compass. The first stop is Noah, who may know something about this sort of thing.
Talk to Noah. He will give up the Compass just like that.
Tempting business
Owl offers you a pleasant business. The business, they say, is simple, but extremely profitable. You need to find three Veles detectors and give them to the mechanic in the scientists’ bunker in the vicinity of Jupiter. He will modify them and send them back to Sychu with guides.
Where to get detectors: from a certain point Sych will start selling detectors himself. You will find one in the cabin of an excavator in the village of Kopachi (near Jupiter), and if you are lucky, you can remove such a detector from the body of a zombie - they almost always have a detector with them, but most often it is a Bear or a Response.
After giving them to the mechanic, some time will pass and Sych will send you a message. Go and find out that Beard doesn’t seem to want to fulfill the terms of the contract. Beard says the opposite and gives you a detector, which he will not buy back. Talk to Owl. He will offer to bend the Beard over the Sultan. At the same time, you can demand a share of the profit on the spot - the further quest will not be lost, but you will receive 1500 money.
The Sultan proposes to cut off supplies to Beard. Tell him that he is now waiting for the Compass order to be completed. The Sultan will tell you to bring the Compass to him.
Dark business
The quest starts after you give the Compass to the Sultan. It is necessary to find the two remaining detectors, thus depriving Beard of the supply of artifacts. Take the quest from him to find the artifact, and follow the stalkers who will also go looking for them. You can take detectors from their corpses.
Other people's merits
Flint at Yanov station tells unprecedented stories, in which he assigns himself the main role. We need to expose him. Talk to him about clearing the lair of bloodsuckers and “his” other exploits.
Head to the quarry. There you will find a wounded stalker who, before dying, will tell you what and how. As soon as you enter Yanov, Flint will delight you with a new story, from which it will become clear that he is a bastard. Talk to him, he will send you far, after which he will delight you with another story, from which it will become clear that Flint is none other than Soroka, whom the guys in Skadovsk are looking for. Burnt out, smoking room. Inform the leader of the debtors (or Svobodovites) about Flint (get friendship with the group, because if Debt is already “green” go to Freedom and vice versa), and then run to Gonta, tell him that Soroka has been found. All three quests will be completed.
Hunting
The St. John's wort in the basement of the Yanov station will ask you to clear the lair of the swamp bloodsuckers behind the cement plant. There are three bloodsuckers, and the most profitable tactic is grenades. We empirically establish the distance at which they see you, but do not attack, but trample along the border of their range. When you find such a place, throw about five or six grenades there, it should be enough. I can also recommend a tree near their habitat. Climb on it, they will come running to you, circle and run away. In moments of running away and running (when their direction of movement does not change), it is easy to hit them. This method takes longer. I advise you to shoot single shots - long bursts will do no more good, they will only waste ammo.
You can go collect your reward.
The next mission from St. John's Wort will be to clear the tunnel from unknown mutants. There are no unknown mutants at the indicated coordinates - only two burers. Due to their number, the tactic called “carving the burer” is changing to a more different one. First, you can try to catch them by surprise, throw F1, and then shoot at them, occasionally peeking around the corner (without giving them time to aim at you with a gas welding cylinder or other heavy object). Having an under-barrel grenade launcher and ammunition for it helps a lot. Literally three or four shots and hello. When everything is ready, go for the reward (there is nothing else in the tunnel - you don’t have to look).
Hunting the Chimera
After St. John's Wort mentions the events with the Chimera, talk to Gonta. He will suggest approaching at three o'clock in the morning, when the chimera is sleeping. At the specified time, talk to him, and you will find yourself on a farm not far from Skadovsk. Chimera stands on stage. Open fire and try not to get in her way. Jump to the side. When she is dead, talk to Gonta to move to Skadovsk. You can report the completion of the quest to St. John's wort.
Night hunt
After killing the chimera on Zaton and completing the quest, St. John's Wort will contact you by radio and say that he has tracked down another one. During a personal conversation, he will offer you to kill her for 10,000. We agree. The chimera is located near the ventilation shafts to the south of the parking lot where we placed the scanner. Enter through the northern gate and immediately climb onto the dilapidated wall with a piece of tin hanging over it. There is also a cache there - it should be right behind your back. The chimera only caught me once at this point, mostly it will jump around this brickwork. Your task is to shoot at her from a shotgun, machine gun (single) or - the most effective - from a grenade launcher. Choose moments when she lands not too far away, but not too close, and shoot. After a successful hunt, you can report your success to St. John's Wort.
Surviving Monolith
A detachment of Monoliths has escaped the control of the zone and now does not know where to go. We need to go talk to the inhabitants of Yanov, convince them to accept their former opponents.
On Yanov, look for yourself where you go - with whom you have a better relationship, go to that one. If you are friends with both Duty and Freedom, choose according to your taste. Shulga, for example, will agree to take the squad under your wing under your responsibility. He will select two fighters, you will take them to the Monoliths (the transition will take place according to the script, there is no need to stomp your feet anywhere). There the Duty officer will take the oath. Talk to the former commander of the Monolith, with him you can quickly get back to Yanov.
The Adventures of Uncle Yar
Dadka Yar on Yanov will ask you for help with one matter. We agree and find ourselves in the village of Kopachi. Don't be afraid of the zombies around you - put away your weapon and follow Yar at a walking pace. In the attic of the house, take out the gun and help shoot the mercenaries. Most likely, after the mercenaries, the zombies will also have to be eliminated, because... they will become alarmed and open fire. The quest is over, you will find out the details from Yar. He will take you back to the station.
Oasis
Professor Ozersky will ask you to find out about the local legend - the Oasis. As proof of the existence of this legend, he asks for some artifact from there.
The entrance is located to the west of the ventilation complex, where the Night Hunt quest takes place. First there will be zombies, then jerboas (quite a lot). As a result, you will come out into a large hall with four rows of columns. You will recognize it easily as you will go through it again and again. It's a puzzle. After a certain number of turns, several arches will be illuminated. Your actions are as follows: we enter the hall, and walk around its perimeter (I did it counterclockwise) and return back to the corridor through which we entered the hall. We will hear the sound of the fourth teleport turning on. Now we go through as we like, again we teleport to the entrance to the hall, but now we go through all four teleports. The teleport turns off and does not throw us back, but lets us into the Oasis.
Before taking the artifact from the tree, reload your weapon. It's not difficult to fight a psi-dog: phantoms will attack you, while the psi-dog itself will try to stay away. Identify it and keep your eyes open. When you shoot, you can get out through the top.
Take the artifact to Ozersky and give it as proof of the existence of the Oasis.
Security of scientists
The quest is given by Herman after bringing him documents from Jupiter. Go to the head of Duty/Freedom (what you like more and with whom the relationship is better) and talk about singling out people. The next time you come to Herman, collect your reward.
Abnormal plant
After starting the quest of gathering a team for the trip to Pripyat, Sokolov will need a suit. Talk to Ozersky. In return, he will ask you to take a sample of the anomalous vegetation at the edge of the quarry.
Swept away. With Svarog, getting to the center is not a problem. We take a plant and immediately see that the number of anomalies has increased sharply. However, getting out with an uber-detector is still easy. We take the plant and receive an assurance to give Sokolov equipment upon request.
If all quests for scientists have been completed before, you will receive the title Discoverer.
Strelka group documents
You may have come across these documents during your independent study of the Zone. For a complete set, Strelok will later give away a couple of artifacts, and you will receive a title. The first document is located under the cement plant in the tunnel - the entrance is from the swamp.
The second document lies in the cabin of a mining excavator in the quarry. You can climb there from the tree behind the car.
The third and last document lies in a pipe in a hole under some industrial installations north of the first department building on the territory of the Jupiter plant.
At the beginning of the game you will need to explore several helicopter crash sites.
Skat-3
Go to the crash site marked on the map. A helicopter is visible at the top of the hill. It won't be possible to get there yet.
Skat-5
Follow the desired point on the location and you will see a helicopter located in the center of the swampy area. There are also anomalies here. Follow the helicopter on the other side of the road. Near it, approach the circle until you see a hint. You will need to press the F key to examine the spinner.
Skat-2
Follow the right place on the map and you will see a fallen aircraft on the territory of the power plant. There is an anomaly - a phantom that just wants to throw some object at you. You need to act quickly: run to the helicopter and study it like Skat-5.
A quick walkthrough of the game Stalker Call of Pripyat in the video below (less than an hour):
Skat-1
Mark the desired location by selecting tasks and move towards it. This is a barge. To get inside it, you need to hide your weapon. Click on the "1" or "2" key to do this. Inside the barge, at one of the tables in the center, find the guide. Chat with him and offer the found maps of the area (Skat-2). For this you can get a decent discount on moving. Tell him that you need Yanova Station. Pay 1000 coins. By the way, if there is no discount, then the cost of the transition will be 2000 coins.
After talking with him, talk to the technician and leave the building. Go to the Skat-1 location, where there is a minefield.
To get through this field, you need to walk along the chain-link fence on your right. Periodically follow the fence closer to the center to avoid other mines. Try to save as often as possible. This is how you can choose the right road. Once you get to the helicopter, take the black box.
Skat-4
Follow the marker, selecting the appropriate task. You must go to the factory. Follow between the two buildings and go to the right. Keep the yellow pointer on the minimap to your right. Find a passage inside the workshop and on the right side find a hole there. Jump into it, move through the corridors and go up the stairs. Move through the room where the documents are on the panel. Inspect them or move on. At the helicopter, deal with the dogs and study it.
Black box with Skat-1
Move to Yanov as you did earlier. Chat with the technician you saw when you first visited this place. Give him the black box and you will learn that it will take more time to decipher it. If you want to make money, then try chemical engineering. factory to find the parts and tools needed by the equipment. The task is optional, but desirable.
How to get to Skat-3
Go to the bar on Yanov, or visit the barge on Zaton to talk to various gunslingers. Try to find out information about crashed helicopters. One of these NPCs should tell you how to get to the Southern Plateau, where the third Stingray is located. True, he will say that Noah has this information. Go to Zaton when you learn about Noah and follow the barge where the man is. Once you open the door, take your time as the man will shoot at you. Put away your weapons and go to Noah. Talk and learn about the crashed helicopters. Agree to go to the plateau with him.
Repeat Noah's movements and jump down so that the anomaly will move you up to the crash site of Scat-3. Go up to it and study it. This will give you information about the three evacuation points. They will need to be checked.