On the eve of the new year 2015, the Japanese company Brother introduced the world to a series of monochrome printers with functionality to meet the printing needs of any user - from the humble home to the demanding corporate. The line was presented by devices Brother HL-L2300D, L2340DW, L2360DNR, L2365DWR; DCP-L2500DR, L2520D, DCP-L2540DNR, L2560DWR; MFC-L2700DWR, L2720DWR, L2740DWR.
The toner cartridges used in the new line are traditionally divided into standard (1200 pages) and enlarged (2600 pages). "Starter" cartridges can be filled for 700 and 1200 pages of printing (with 5% toner coverage of A4 size print), depending on the model of the device.
To refill the "starter" cartridge, in addition to toner, you will also need a reset flag (to reset the printer counter). We will use a set consisting of a toner bottle, a flag with a spring and a cap for the toner bottle. The reset flag is needed only for the starter cartridge. In the future, only a can of toner is required for refilling.
So let's get started.
Disassembly of the cartridge begins with the side cover. We unscrew the screw fixing the side cover from the side of the gears.

Remove the side cover.

Under the cover we will see two white gears. We remove them one by one, freeing access to the plug of the toner hopper.

The stopper of the bunker is clogged quite tightly. If you do not uncork it carefully, you can easily cut off the edges. Therefore, we open the cork slowly, prying along the edges with a flat slot screwdriver.

We pour out all the toner remaining in the hopper, and, if there is a toner vacuum cleaner, we thoroughly vacuum the hopper from the inside. We are often asked - why pour out the remaining toner, why not just add a new portion and print on? The answer is obvious: Brother cartridges do not have a separate waste toner box; all toner residues after printing are returned to the same hopper, from which they again enter the print path. During the entire cycle of the cartridge, not only waste toner accumulates in the hopper, but also paper dust, which, mixed with toner, forms dirt unsuitable for printing. Therefore, we are not lazy and carefully clean the hopper from the old toner. Adding a portion of new toner to an uncleaned cartridge will result in dirty prints and false assumptions about poor toner quality.
Let's get back to disassembling the cartridge. We release the plug from the screw:

We remove the plug one by one, the large white gear, then the small white gears:

We remove the lock washer of the developer roller (which is often referred to as a magnetic roller, although it is not magnetic by definition):

On the opposite side of the cartridge, you need to remove the black sleeve. It is secured with a screw on the outside.

and has two toothed retainers, which we will gently bend to remove the sleeve:

The bushing consists of two parts that do not have to be separated. It will be better if we remove it "assembly":

Now let's return to the guide sleeve on the side of the cartridge plug. She also has two toothed retainers, which must be taken into account when removing the sleeve.

Now you can remove the developer roller from the seat. Immediately below the roller is a doctor blade, which is secured with two screws at the edges. Loosen these screws:

So we got to the niche of the toner hopper. Inside the niche is a foam roller for supplying toner. Carefully clean the dispenser roller from toner residue using a toner vacuum cleaner:

We draw your attention to the foam seal around the perimeter. The fact is that it is not fixed in anything, not glued to the body, and therefore we try to vacuum it so as not to drag it inside the vacuum cleaner:

We return the cleaned dosing blade to its place, fix it with screws along the edges. The cleaned magnetic shaft is also returned to its place.

We install the guide bushing, fix the axis of the developer roller with a retaining ring:

Lubricate the opposite end of the shaft axis with conductive grease. As always, we apply a little lubricant, without excess. Install the bushing and tighten the fixing screw:


Now we can fill the cartridge with toner. We use 100 gram toner produced by Static Contr o l Components code B 2240-100 B - OS . This toner is enough to print 2,600 pages (according to ISO/IEC 19798).

After filling the cartridge tightly cork the hopper stopper. Then alternately install the white gears. Install the gear tooth as shown in the photo:

From above we install the second gear and the reset flag. You will now see that the white gear tooth is next to the inner tooth of the reset flag.

It remains to install the spring and close the gears with a side cover. Pay attention to the correct starting position of the counter reset flag.

The cartridge is ready.
Internet shop "IT specialist"
MFC-1810R, MFC-1815 we need screwdrivers: straight and Phillips, as well as compatible toner. Recommend B1110-60B manufactured by Static Control Components.
Video first.
Disassembly
- Unscrew the two screws on the side cover of the cartridge.
- Pry off the latch with a straight screwdriver and remove the side cover.

- Remove the magnetic shaft sleeve shown in the figure below.


- We remove the gears. The last one (shown by an arrow) can be left untouched.

- With a straight screwdriver, pry off the locking or fixing washer on the magnetic shaft and remove it.

- With a straight screwdriver, pry off the two locks securing the base of the gears.


- On the other side of the cartridge (from the side of the filling hole), unscrew the screw.

- With a straight screwdriver, we snap off the fastening of the magnetic shaft sleeve and carefully remove it.

- Using a straight screwdriver, unfasten the fasteners of the side cover of the cartridge and remove it.


- Remove the released magnetic shaft.

- Unscrew the two screws securing the doctor blade. The latter is glued to the body with foam rubber along the edges. Remove the doctor blade by carefully prying it with a straight screwdriver on both sides, trying not to bend it.

- Shake out the remaining toner in a bag. Whatever is left is vacuumed.

- Clean the doctor blade with a dry cloth. You can add a little isopropyl alcohol.
- We clean the magnetic shaft with a dry clean cloth.
We wipe the contacts of the magnetic shaft and its bushings with alcohol.
Refueling
- If you have a warranty on the printer, then refill the toner as follows. Approximately 45 grams for 1000 sheets. You can fill all 60 grams (the whole jar). When the message “Replace the cartridge” or the like appears, you need to reset (more on this at the end of the article).

If there is no warranty for the device, it is better to assemble the cartridge and pour the toner into a special hole.

Assembly
- Install the doctor blade and fasten it with screws on both sides.

Install the magnetic shaft.
- With conductive grease, we process the contacts of the magnetic shaft and the toner supply roller.

- We install the shaft bushings and fasten it with a screw from the side of the filling hole.

- We install the lock or fixing washer on the magnetic shaft.

- We install the gears in the specified sequence.

We don't have a flag. We will reset manually. Install the remaining gear.

- We install the side cover of the cartridge and fasten it with two screws.

Cartridge loaded. You need to reset the counter.
Reset counter
Read more in this article and in the video below.
Now you can assemble and insert the cartridge into your Brother HL-1110R, HL-1112R printer or other device.
Print with pleasure.
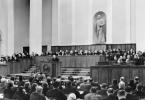
January 15, 2015 at 18:00 at the House of Scientists VNIIEF opened an exhibition of Nizhny Novgorod falerist Vladimir Viktorovich Zharinov "SPACE AGE - ICONS AND SIGNS".
Photo 1 - Exhibition in the lobby of the VNIIEF House of Scientists
Formally, the exhibition is dedicated to the 60th anniversary of the Baikonur Cosmodrome, but in fact it covers the entire history of space exploration from the beginning of the Space Age (1957) and manned Cosmonautics (1961) to the celebration of the anniversary of Baikonur (2015). The exhibition was opened by Olga Alexandrovna Ostaptseva, an employee of the Department of Education, one of the main organizers of this extraordinary event. She introduced the Nizhny Novgorod collector to a few participants - Sarov falerists and philatelists, presented V. V. Zharinov with a bouquet of flowers.

Photo 2 - Olga Alexandrovna Ostaptseva opens the exhibition
Vladimir Viktorovich himself is very interesting person! A retired KGB colonel, on duty he looked half the world, was investigating the tragic explosion in Arzamas on June 4, 1988. Today he is the executive director of the Nizhny Novgorod regional public fund "COSMONAVTIKA".

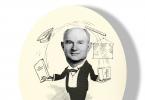
Photo 3 - V. V. Zharinov in his apartment (collage by Natalia Plankina)

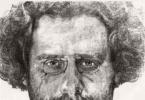
Photo 4 - V. V. Zharinov in his workshop (photo: Natalia Plankina)
Even before the official opening of the exhibition, Vladimir Viktorovich was “taken into circulation” by our journalists and television people.

Photo 5 - V. V. Zharinov listens to questions

Photo 6 - And answers them

Photo 7 - Interview to Channel 16, in the foreground Dina Pavlova
Vladimir Viktorovich loves to tell how he started collecting space badges. As an 8-year-old boy, he learned from Pionerskaya Pravda that on October 4, 1957, our country launched the First Satellite in the World, and that it could be observed in the night sky. And, of course, thousands of boys of the USSR, like him, saw the FIRST SATELLITE! But not everyone wrote about it in Pionerskaya Pravda, but Volodya did! And he received the most valuable badge "For participation in observations" as a gift from the newspaper!

Photo 8 - Badge "For Participation in Observations" (1957)

Photo 9 - Back side badge "For participation in observations"
With pride, Volodya wore this sign for more than one month, and got so carried away that he began to collect all the badges dedicated to space exploration in the USSR! Vladimir Viktorovich showed journalists a box from his pocket with the first badges dedicated to Yu. A. Gagarin (1961).

Photo 10 - The first badges of the USSR dedicated to Yu. A. Gagarin
Especially valuable is the first all-metal badge with hot enamel.

Photo 11 - The first metal sign with Gagarin
And round badges with photos of the first Soviet cosmonauts were sold here in Sarov (Arzamas - 75), in the Lily of the Valley store on Prospekt Mira, starting from 1961 for 11 kopecks. The first detachment of cosmonauts of the USSR could be easily assembled, if desired, on the badges of this particular type.

Photo 12 - The first badge of the famous series of the first astronauts
After the opening and numerous questions, Sarov collectors took pictures with V. V. Zharinov.

Photo 13 - Participants of the opening of the exhibition and collectors of Sarov
with V. V. Zharinov (he is second from the left with flowers)
Now, in more detail about the exhibition itself. The exhibition is located on 10 standard exhibition stands from the RFNC-VNIIEF Museum of YaO.

Photo 14 - Exhibition stand "Yuri Alekseevich Gagarin"

Photo 15 - Exhibition stand "50 years of the first manned flight into space"

Photo 16 - Exhibition stand "Baikonur" and "Star"
The stands feature 46 glazed frames - horizontal tablets with a size of 470x370 square meters. mm (4-6 pieces on each stand). Each tablet has up to a hundred badges, badges or medals from the author's 13,000th collection. That is, about a third of the collection (about 4 thousand pieces) is on display. Each tablet is devoted to a separate topic or, if the topic is large, then it occupies several tablets (for example, “The Flight of Yu. A. Gagarin”).

Photo 17 - Tablet "First artificial satellite Earth is OUR"

Photo 18 - The first icons dedicated to the first Sputnik

Photo 19 - Tablet "The first flight of man into space"

Photo 20 - Tablet "Hero Yu. A. Gagarin"

Photo 21 - Tablet "Yu. Gagarin - 50 years of the first manned space flight

Photo 22 - Tablet "BAIKONUR - the main cosmodrome of the country - 60 years"!

Photo 23 - Tablet "Space complex "ENERGIA - BURAN""
In addition to tablets with icons, there are 4 tablets of “design elements” (for example, a portrait of Gagarin from the cover of Ogonyok magazine in April 1971)

Photo 24 - Vertical tablet 270x370 sq. mm with the cover of the April issue of Ogonyok, 1971
Each of the tablets has rare and even unique signs!

Photo 25 - Badge “Department of the FSB of Russia for the Cosmonaut Training Center named after. Yu. A. Gagarin»

Photo 26 - Sign "Air Force Academy. Yu. A. Gagarin»

Photo 27 - Sign "FOR MERIT" Cosmonaut Training Center. Yu. A. Gagarina

Photo 28 - The sign "Gagarinsky District Department of Internal Affairs"

Photo 29 - One of the variants of Zyuganov's Communist Party medal for the 50th anniversary of the first flight into space

Photo 30 - Sign "FROM SOVIET space explorers"
Vladimir Viktorovich claims that he does not collect foreign badges dedicated to the Cosmos! "Import", even dedicated to Soviet cosmonautics, he does not take because of the "immensity of the topic"! However, we managed to make out on the tablet "Buran" right in the center - a PURE American badge - the reusable ship "Challenger"!

And here are some interesting signs dedicated to Baikonur!

Photo 32 - One of the first Baikonur badges

Photo 33 - Badge "Honorary builder of BAIKONUR"

Photo 34 - Sign "1 measuring point" 50 years -1955-2005

Photo 35 - Badge "55 years of Baikonur" 1955 - 2010

Photo 36 - Sign "BAIKONUR - spaceport of the XXI CENTURY"
In a word, the COLLECTION presented in Sarov is UNIQUE. The exhibition will be open in the foyer of the DU until the end of January! Hurry up to see the space phaleristics of our country, starting with the first copies of Soviet badges! You will be pleasantly surprised and amazed.
And to the owner of the collection, V.V. Zharinov, we say a BIG THANK YOU and wish to find and purchase another 4 thousand space icons, which he has so far only in photographs, and, most importantly, to fulfill his cherished dream, to publish a color catalog on space phaleristics of the USSR and Russia from 1957 until 2015!
Aleksey Demidov – senior researcher at IPE RFNC-VNIIEF,
badge collector with 45 years of experience,
Sarov, January 2015